




Find your motherboard's memory-profile setting, save one change, and verify the result.
Reviewed October 8, 2026 · Memory Setup · U.S. edition
Your new PC reaches Windows, but the memory speed does not match the kit's box. Before manually changing voltages or timings, check whether the kit has a supported XMP or EXPO profile. This guide covers current desktop BIOS examples from ASUS, MSI, and GIGABYTE. Your exact motherboard and BIOS version determine the controls you will see.
What XMP and EXPO actually do
XMP and EXPO store preset memory settings so you can select a profile instead of entering its parameters individually. Intel XMP is used with compatible memory and platforms; XMP 3.0 covers DDR5 kits. AMD EXPO provides Ryzen-optimized DDR5 profiles for AM5. Intel XMP overview · AMD EXPO overview.
These are overclocking profiles, not a promise that every system will reach a particular data rate. The CPU's memory controller, board, BIOS, kit, and module configuration all matter. Review the manufacturers' operating and warranty terms if you plan to run beyond stock specifications. Start with the kit's ordinary supported profile before adding manual tuning or extra board-specific performance modes.
Before you change a setting
- Establish a baseline. Confirm the PC boots reliably at its default memory settings. Write down the current speed and BIOS version.
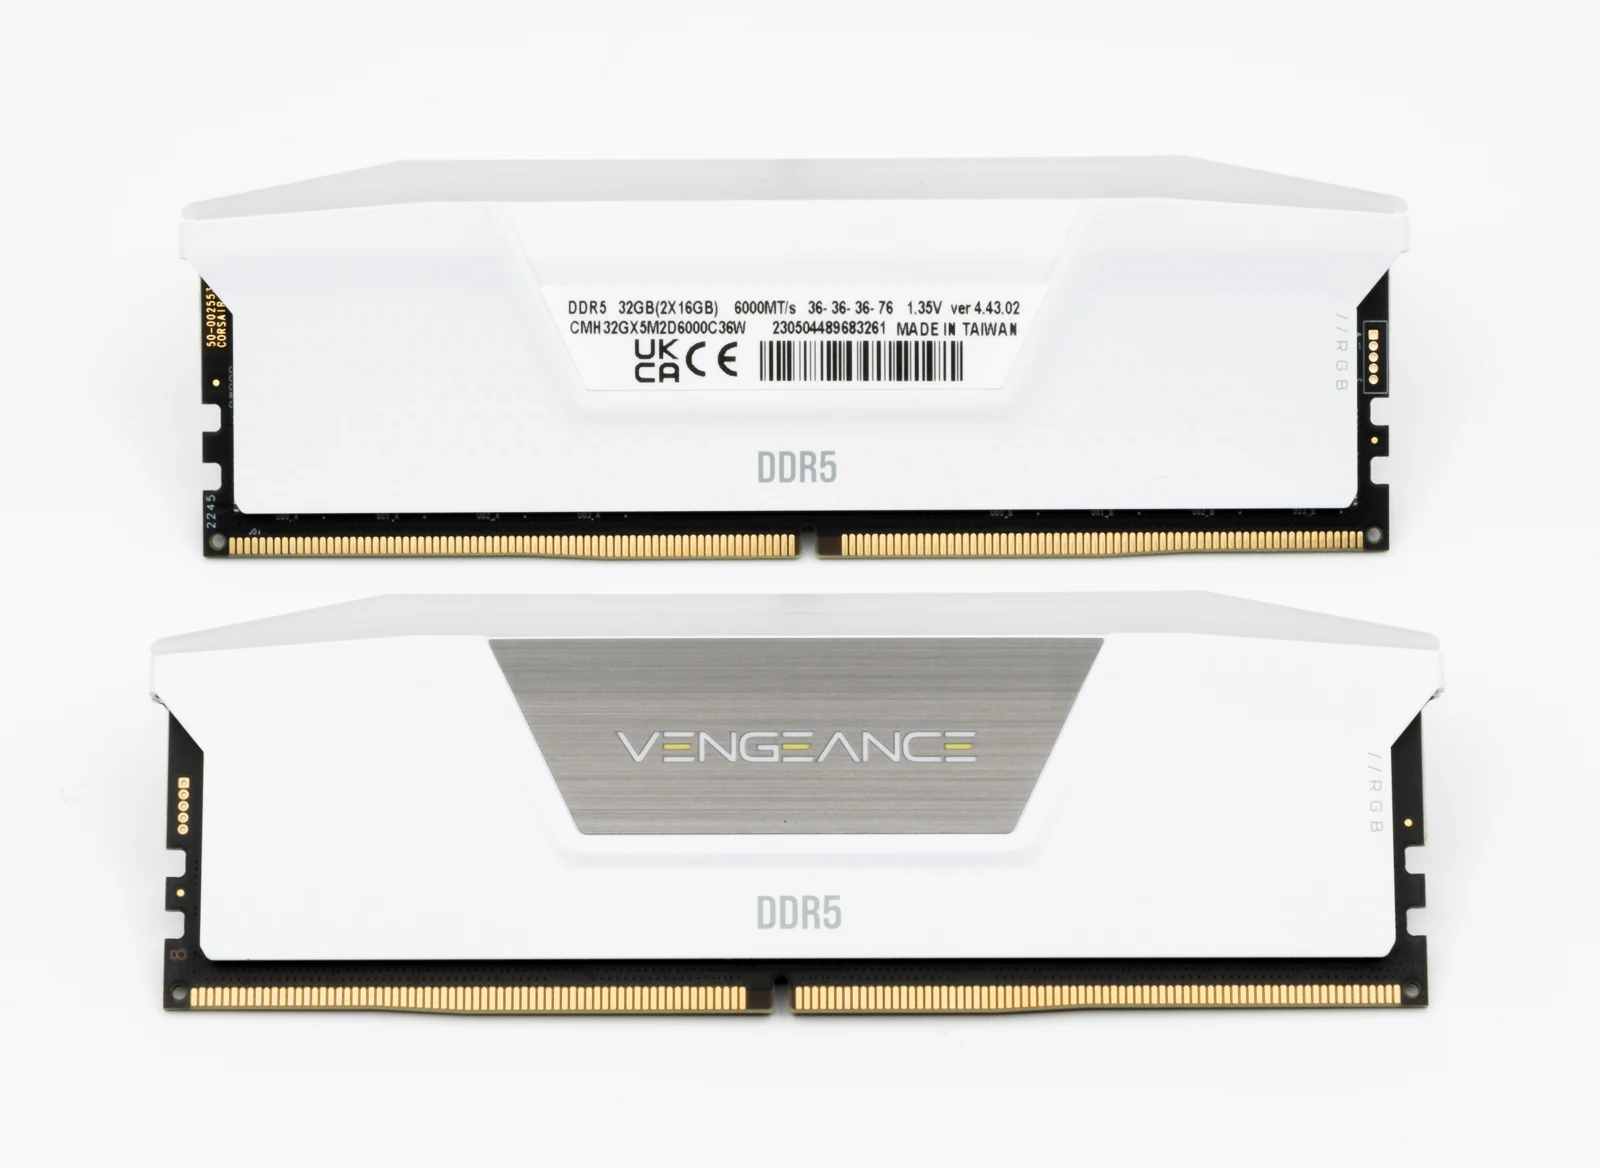
- Identify the kit. Check its exact part number and whether it provides XMP, EXPO, or both. The motherboard cannot offer a profile the modules do not contain.
- Check compatibility and placement. Use the board's memory support list and recommended DIMM slots. Keep a matched kit together; do not assume that combining two kits will preserve their rated profile.
- Know your recovery method. Locate the exact manual's clear-CMOS procedure before experimenting. On an encrypted Windows installation, make sure you can access the recovery key before broader firmware or security-setting changes. Microsoft recovery-key guidance.
MSI's current B850 manual notes that supported speeds depend on the CPU and memory configuration. Use the support page for your exact model to check its tested kits. MSI compatibility notes.
ASUS: Ai Overclock Tuner
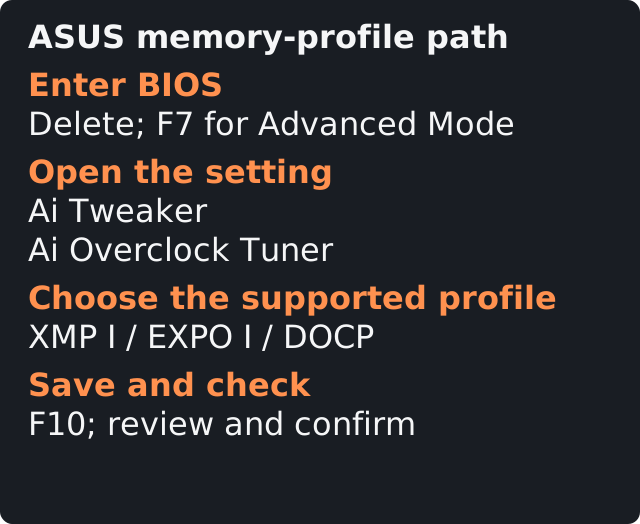
ASUS's support guide was updated September 10, 2026. Its standard examples use this path:
- Restart and press Delete during startup to open BIOS.
- If you start in EZ Mode, press F7 for Advanced Mode.
- Open Ai Tweaker → Ai Overclock Tuner.
- On Intel with an XMP kit, select XMP I. On AM5 with an EXPO kit, select EXPO I.
- Press F10, review the change, and confirm to save and restart.
ASUS also documents DOCP for some cross-platform combinations, including XMP memory on AM5. Some boards place the setting under Extreme Tweaker. Follow the options your actual kit and BIOS expose. Begin with the standard profile rather than XMP Tweaked, which adds further tuning. ASUS instructions and real BIOS screenshots.
MSI: the memory control in Click BIOS X
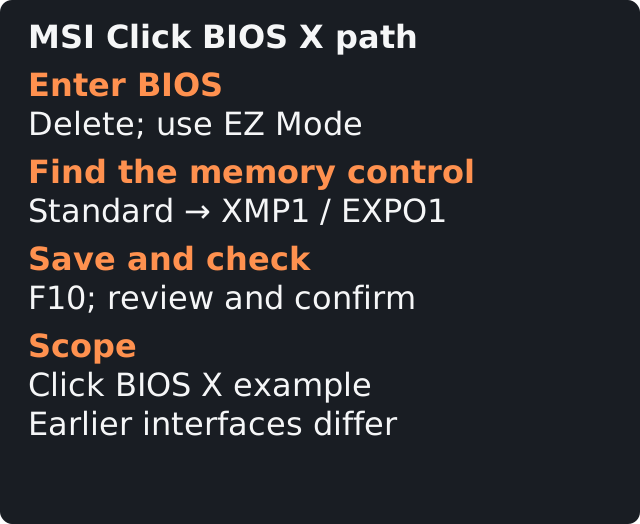
MSI's July 21, 2026 guide uses Click BIOS X. For boards with that interface:
- Restart and press Delete to enter BIOS.
- In EZ Mode, find the memory-profile control near the upper-left area.
- Change Standard to XMP 1 or EXPO 1, as supported by the installed kit and platform. MSI's illustrated choices may appear as XMP1 or EXPO1.
- Press F10, inspect the changes, and confirm to restart.
Leave additional memory-extension or latency-tuning features alone for this first check. If your board uses an earlier Click BIOS interface, its controls can differ; use its BIOS guide rather than looking for a button that is absent. MSI instructions and real BIOS screenshots.
GIGABYTE: the profile setting under Tweaker
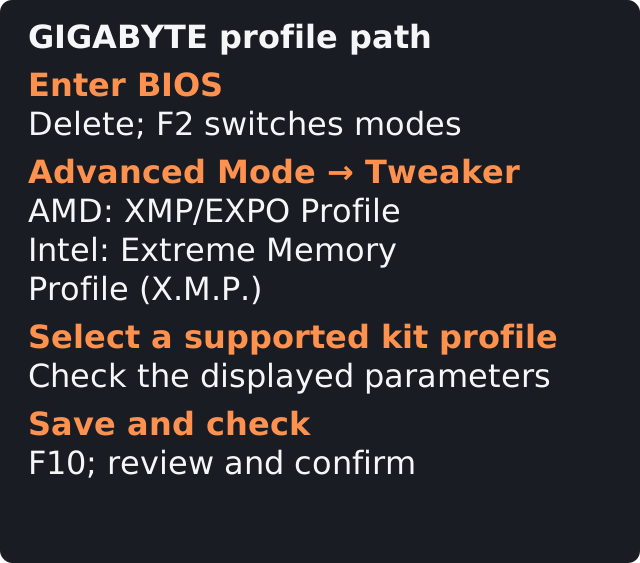
The AMD 800-series BIOS guide dated May 12, 2026 documents XMP/EXPO Profile. Use the following route on a board with that interface:
- Press Delete during startup to enter BIOS.
- Use F2 to switch between Easy and Advanced Mode if needed.
- Open Tweaker → XMP/EXPO Profile.
- Select the supported profile supplied by your kit. Check its displayed data rate and parameters before saving.
- Press F10 and confirm the change to save and exit.
The Intel 800-series guide instead calls its control Extreme Memory Profile (X.M.P.), also under Tweaker. That label difference is expected. Leave extra DDR5 boosting and high-bandwidth options at their existing settings while you test the ordinary profile. GIGABYTE AMD 800-series BIOS guide · Intel 800-series BIOS guide.
Let the next boot finish, then verify
A memory change can trigger training, with a blank screen and a longer startup than usual. Give the board's documented training process time to finish. Do not assume that every board uses the same delay, and avoid repeatedly switching it off mid-training. ASUS memory-training guidance.
After a successful boot, return to BIOS or open Task Manager → Performance → Memory in Windows to check the reported speed. Compare the selected profile with the actual result. If the board reverted to defaults, the fact that you selected a profile once does not mean it stayed active. ASUS speed verification.
When checking a separate hardware tool, distinguish MT/s (data transfers) from MHz (clock frequency). DDR performs two transfers per clock, so 3000MHz can describe the clock of DDR5-6000. Read the unit before concluding that your speed is half what it should be. Kingston's memory-unit explanation.
A successful boot is the first checkpoint. Use the PC in the games and applications you normally run, and investigate any new crashes, freezes, or memory errors before treating the setting as a reliable everyday configuration. This article does not claim a measured FPS improvement or a stability certification for your machine.
If the profile causes crashes or prevents booting
If BIOS remains accessible, undo the profile change and return it to Auto, Disabled, or the board's equivalent default setting. Save and check whether the problem stops. That comparison helps distinguish a profile issue from an unrelated fault.
If you cannot reach BIOS after allowing the documented training process to finish, use the exact motherboard manual's recovery or clear-CMOS procedure. Disconnect power when the manual requires it; do not short unidentified pins. Clearing CMOS resets other BIOS settings too, so record any custom boot or storage configuration before changing it. ASUS clear-CMOS example.
Once back at defaults, recheck DIMM placement, kit compatibility, and the board's current support notes. A BIOS update may address a documented compatibility issue, but it is a separate procedure. Avoid copying someone else's voltage values for a different kit or CPU.